
Introduction
These Sushi Cards will show you how to use wearable, programmable LEDs and how to control them with code.
WARNING: this project involves bright flashing lights! It may not be suitable if there are people who have epilepsy present.
What you will make
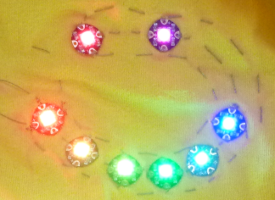
In this project, you will sew LED lights to a T-shirt and write code to make them flash and change colour!
What you will learn
- Testing NeoPixels
- Stitching a NeoPixel circuit with positive, negative, and data flow
- The flow of a Flora program (setup and loop functions)
- Turning NeoPixels on and off
- Addressing individual NeoPixels
- RGB colour mixing
- Functions and parameters
- Using for loops
- Exploring more advanced examples
What you will need
Hardware
- Adafruit Flora or Gemma
- A USB cable
- Around eight NeoPixels
- Conductive thread
- Three pairs of crocodile clips (you can also use pieces of conductive thread instead, but crocodile clips may be easier to test with)
- Optional: a battery pack, which will allow you to wear your finished project without it being attached to a computer!
The LEDs will be controlled by the Adafruit Flora. You could also use an Adafruit Gemma, LilyPad Arduino, or LilyPad Arduino USB; if you do, some small code changes will be needed, such as the number of the output pin and the board setup in the Arduino IDE.
Note: the Gemma does not work with the Linux operating system. It also won’t work with a USB 3.0 port, so you must have a USB 2.0 port or hub to connect the Gemma to the computer.
Software
- The Arduino IDE
###Installing and setting up the Arduino IDE
-
Download the Arduino IDE from dojo.soy/wear2-arduino-ide and install it.
-
Once it’s installed, open the application. There a few extra things needed to make it work for this project.
-
Open the Preferences from the Arduino menu. In the Additional Board Manager URLs box, paste the following and click OK.
https://adafruit.github.io/arduino-board-index/package_adafruit_index.json-
In the Tools menu, go to Boards and select Boards Manager…. Choose Contributed from the drop-down menu. Install Adafruit AVR Boards by Adafruit. Then click Close.
-
Quit and restart the Arduino IDE. Go to the Boards menu again and you should see the Adafruit Flora, Adafruit Gemma, LilyPad Arduino, and LilyPad Arduino USB listed. Select the board you will be using.
-
In the Sketch menu, go to Include Library and select Manage Libraries…. Type
neopixelinto the search box. Install Adafruit NeoPixel by Adafruit. Then click Close.
Additional materials
- An embroidery needle and scissors
- A T-shirt
- Clear nail polish
- Optional: an embroidery hoop (recommended to make stitching up your circuit easier)